ZenSoft allows you to set up more than one payment method to make sure you meet your customer’s preferences. The payment methods that you set up at the branch settings appear in the POS window while collecting payments.
Here is the step by step tutorial on how to take payments from customers:
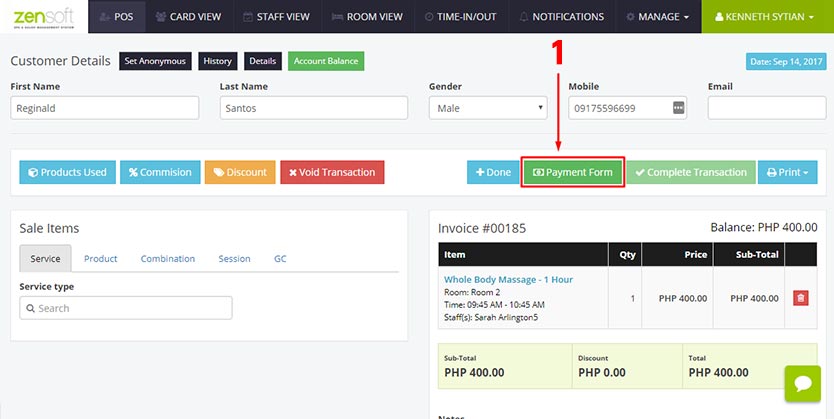
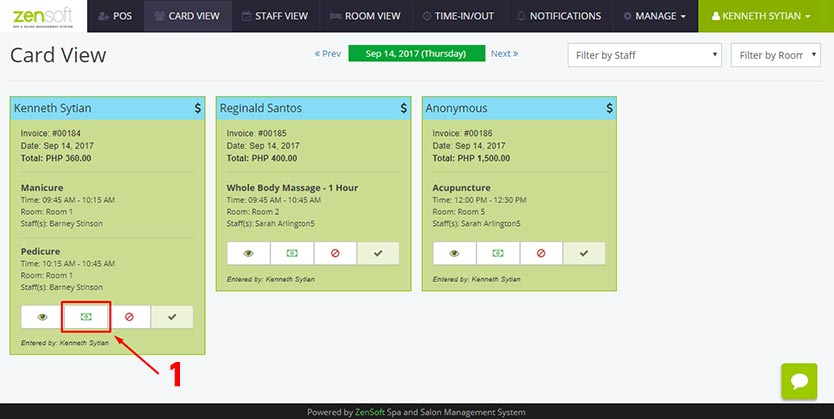
From the Card View page click the PAYMENT ICON or from the Transaction Details page click the PAYMENT FORM button. You will then see a Payment Form pop-up.
ZenSoft can accept the following payment options:
Make sure your branch setting is properly setup to accept the payment method your branch offers. Read Setting Up Customer Payment Methods to know more.
Taking Check Payments
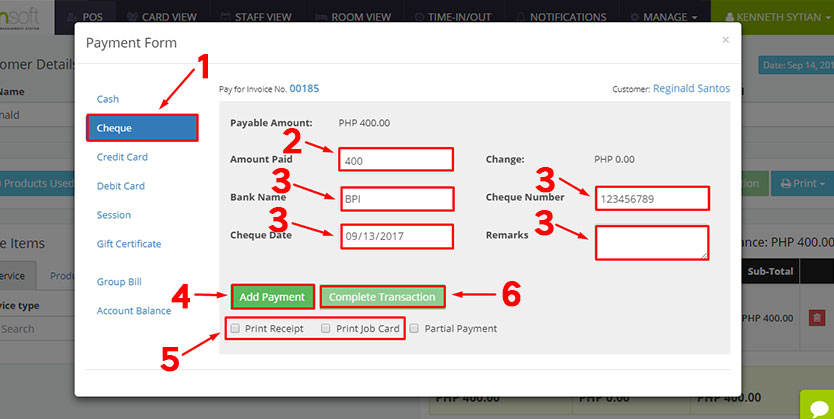
1.) Select CHECK from the payment options.
2.) Type how much the customer paid in the AMOUNT PAID text box.
3.) Type the Bank Name, Check Date, Check Number and Remarks. These are all optional. You may leave this blank.
4.) Click the ADD PAYMENT button.
5.) Optionally, you may put a check mark on the PRINT RECEIPT or PRINT JOB CARD boxes if you want to print them. This only works if you have a POS printer connected to the system.
6.) Click the COMPLETE TRANSACTION button to complete the transaction. Once, you click on this button the transaction will be moved from the Card View Page to the Transactions Page located under the Manage menu.


