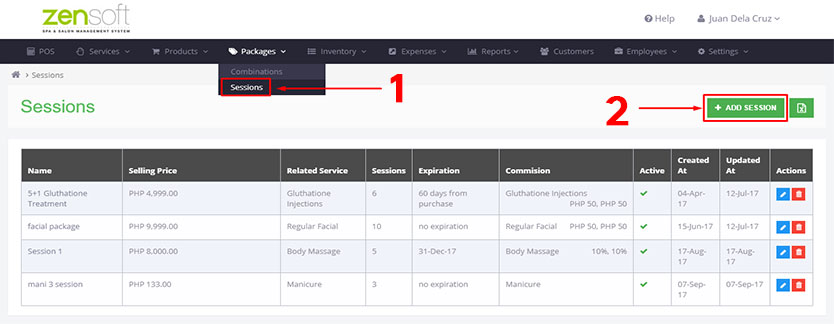
1.) Mouse-over PACKAGES and click SESSIONS.
2.) Click on ADD SESSION
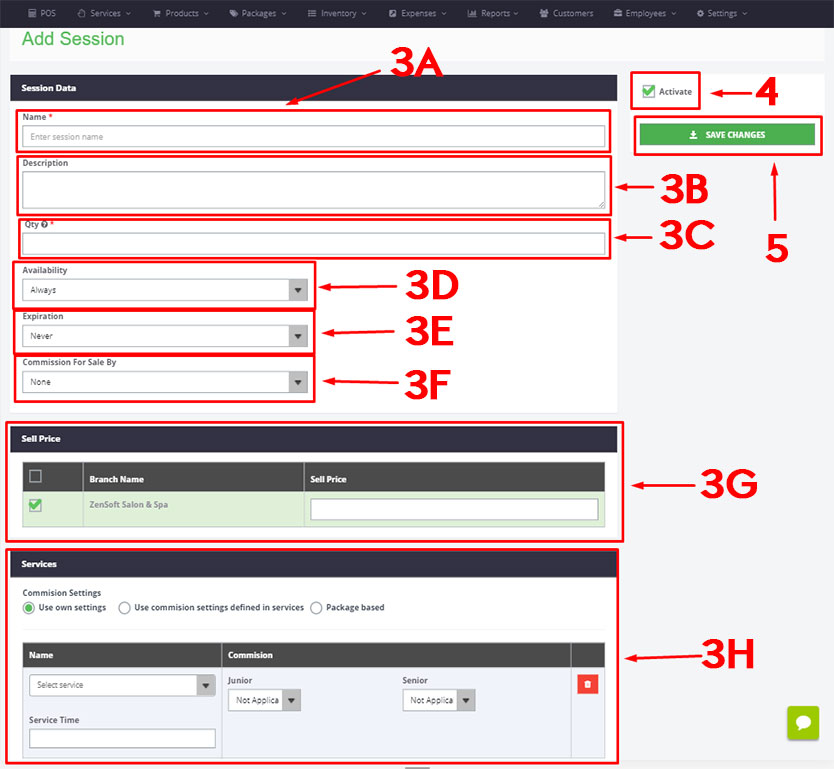
3.) Fill up the following details:
a.) NAME – This is the name of the session package that will appear in POS.
b.) DESCRIPTION (optional) – If you want to add details to the package like services included, number of sessions, etc.
c.) QUANTITY (number of sessions) – This is the total number of sessions to be availed by the customer.
d.) AVAILABILITY– You can indicate if this package is always available or within a certain period only.
e.) EXPIRATION – Select NEVER if the package doesn’t expire, select SET DATE if you want to specify a specific date of the expiration or select DAYS FROM PURCHASE if you want to specify the number of days before the package expires (ex. if the package expires after 1 year, select Days From Purchase and type 365).
f.) COMMISSION FOR SALE BY – Select FLAT AMOUNT or PERCENTAGE if you offer commission to the staff that was able to up-sell the product to the customer. Select NONE, if you dont give any commissions to the person who sold the product
g.) SELL PRICE – Type the selling price of the package.
h.) COMMISSION SETTINGS – This is where you assign commission for employees.
NOT APPLICABLE – When you do not offer commissions for services or packages.
FLAT AMOUNT – When you provide a fixed amount for commission.
PERCENTAGE – When you provide a certain percentage of the service or package amount for commission.
4.) Check the ACTIVATE box – This is to make sure the session package will show up in POS.
5.) Click on SAVE CHANGES.


