How Can We Help?
This article teaches you how to change the header and footer texts on the printed POS.
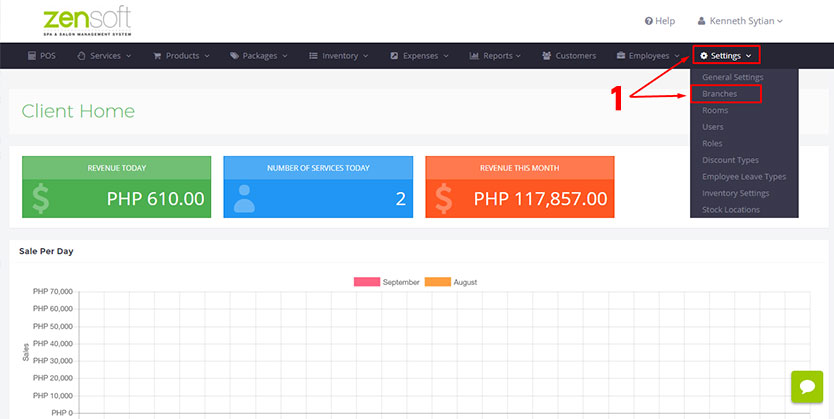
1.) From the Admin Dashboard click on the SETTINGS menu and select BRANCHES.
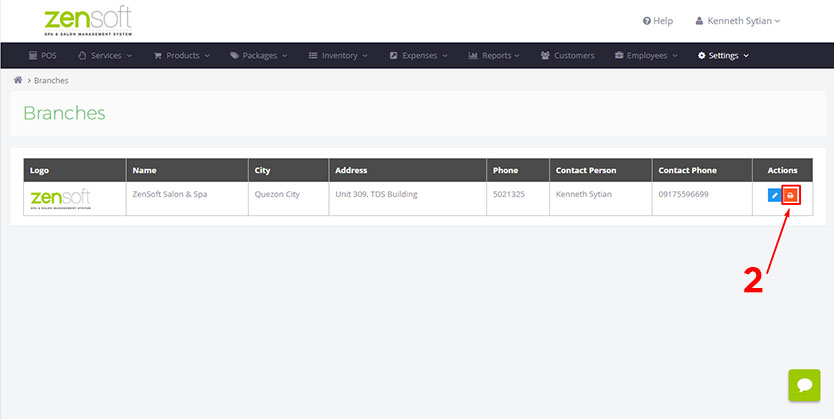
2.) Click on the PRINT icon.
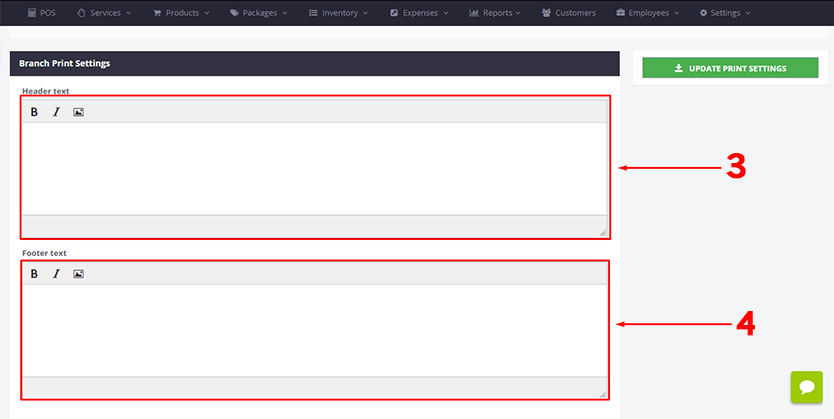
3.) Type the text you want to appear on top of the receipt in the HEADER TEXT box. You may add images in the template by clicking the ADD IMAGE icon.
4.) Type the text you want to appear at the bottom of the receipt in the FOOTER TEXT box.
5.) Click the UPDATE PRINT SETTINGS button to save the changes.


