ZenSoft’s Online Booking module allows your clients to book/reserve your services directly in your salon/spa’s Facebook Fanpage. They will be able to select the booking date, time, services, and their preferred staff (if any). There are no online payments involved yet as of the moment.
After clients book a reservation, your front-desk/receptionist’s ZenSoft POS will receive a real-time notification with the details of the booking.
This article will discuss the how you can setup and integrate the online booking module in your Facebook Fanpage, the process of how the clients book, and how your receptionist/front-desk will manage the online booking via ZenSoft’s POS.
Integrating Online Booking in your salon/spa’s FB Page
1.) Login at Facebook and Manage your spa/salon’s fanpage.
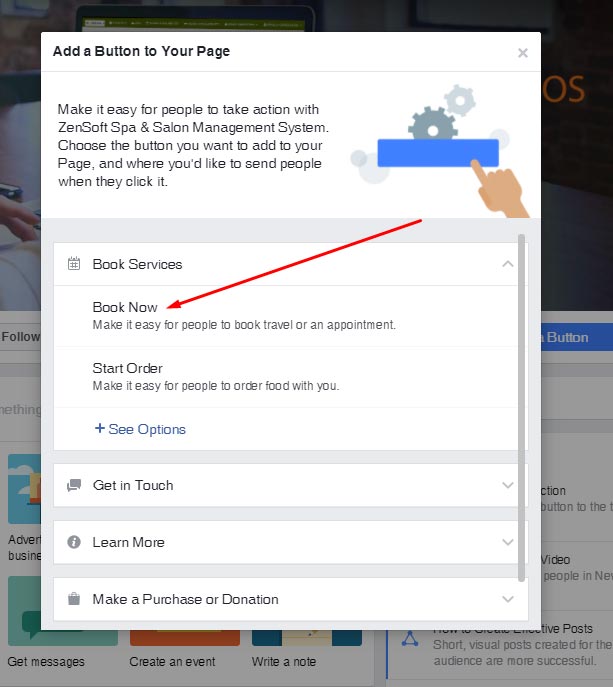
2.) Click the ADD A BUTTON link

3.) Click the Book Now option
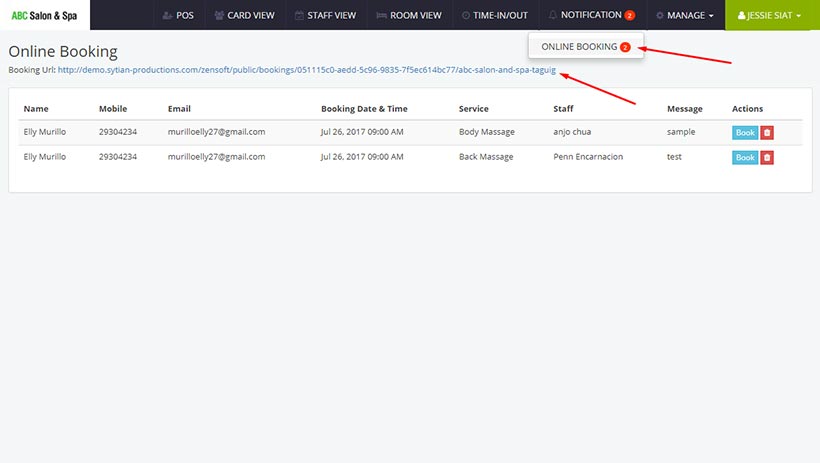
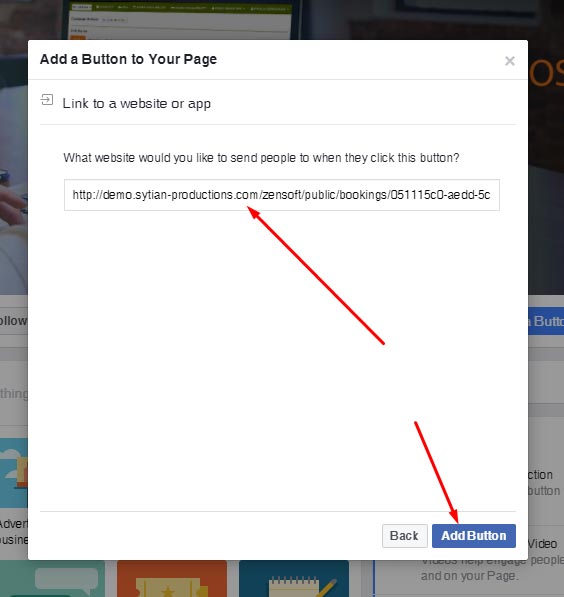
4.) Copy and paste the Booking URL which can be found in your POS and click ADD BUTTON
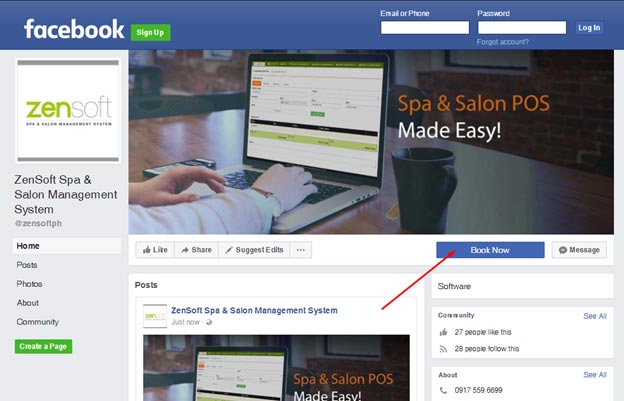
5.) You are done! Your clients can now book directly in your Facebook Fanpage by simply clicking the BOOK NOW button.
6.) Optionally, you can also create a wall post and paste the Booking URL. Prettify the post by uploading an image
.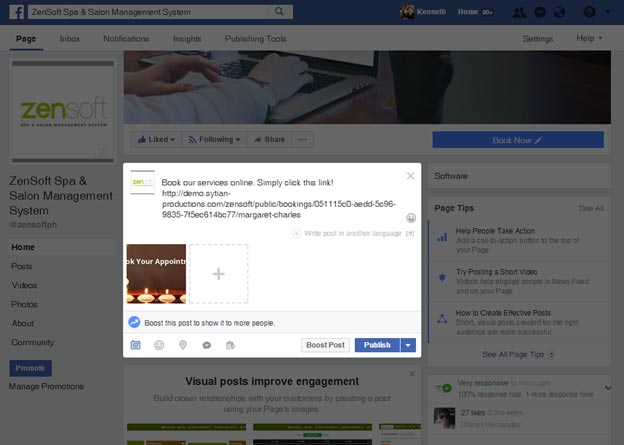
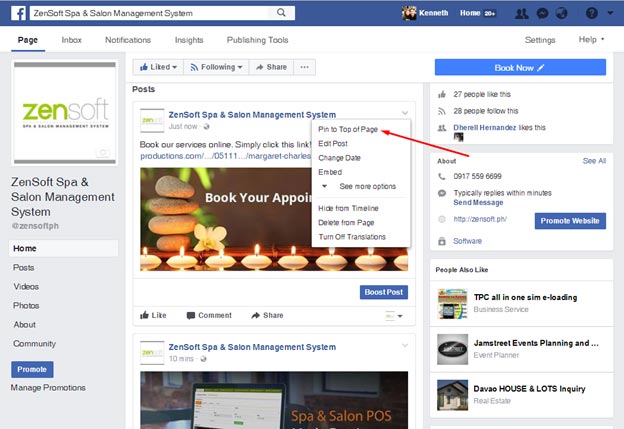
Then, after publishing the post, click the Pin to Top of Page button to make the booking link stick to the top of your fanpage so everyone can see it.
How clients can book in your Facebook Fanpage
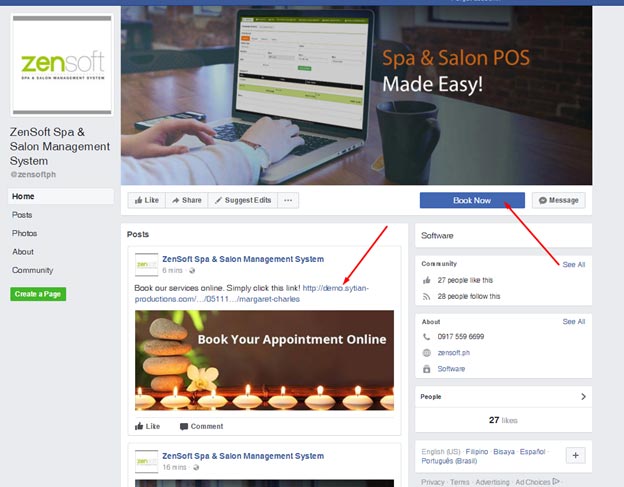
1.) In your spa/salon’s FB fanpage, your clients will simply click the BOOK NOW button on top of your page. If you made a wall post, your clients can also click the booking link as well.
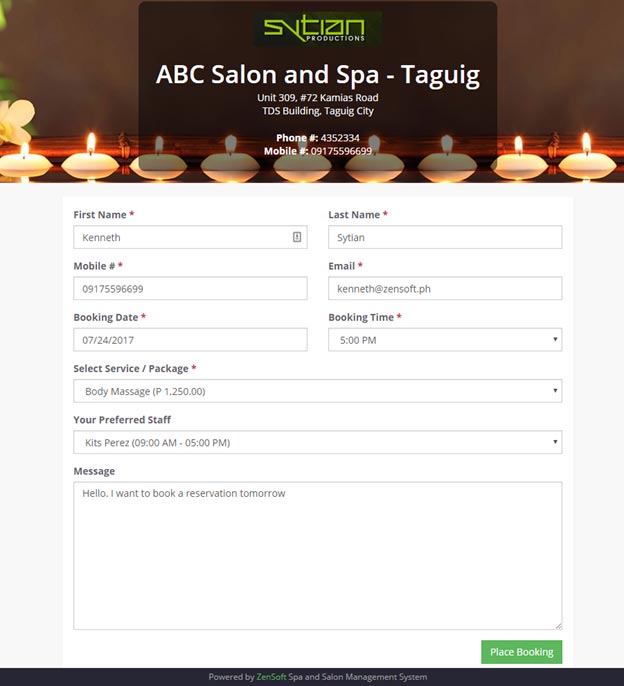
2.) They will then fill out the booking form and click the Place Booking button. You can customize the banner image in your Admin Panel under the branch settings.
3.) You will then get a notification at ZenSoft POS that a new online booking has been made. Please note that clients can book online using their mobile phones, tablets or laptop/computer.
How to manage an online booking
1.) Once a client fills out the Online Booking form, you will receive a real time notification in the ZenSoft POS module. It will be signified by a red icon beside the NOTIFICATION menu.
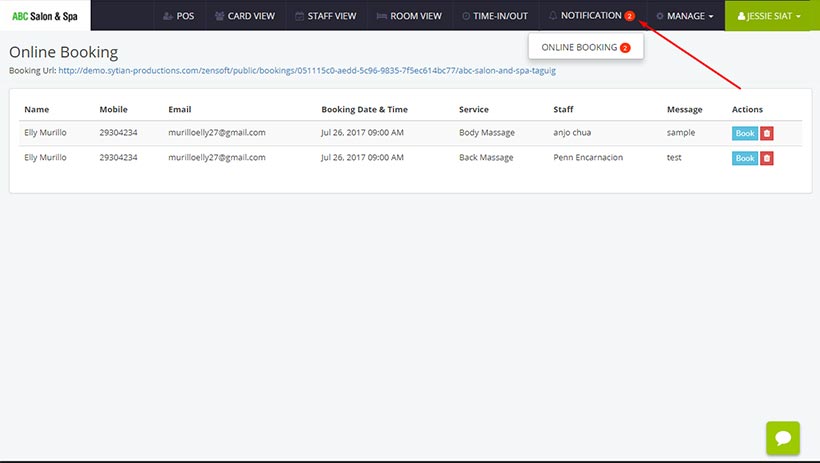
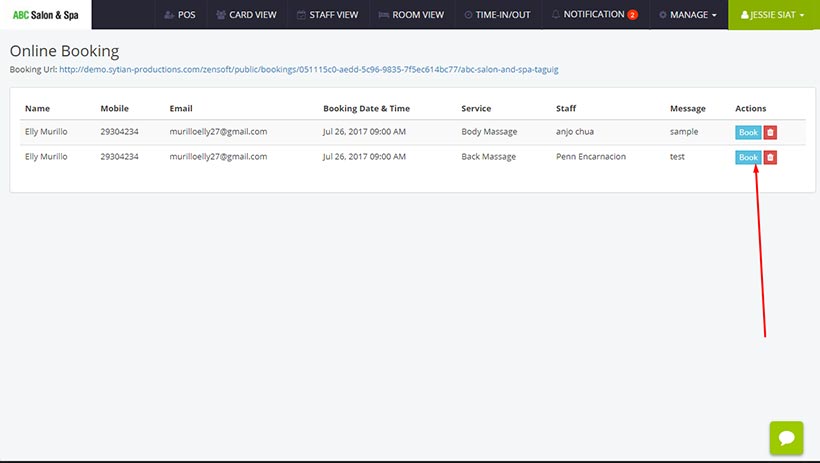
2.) Click the ONLINE BOOKING module to see the appointment details. It would be best if you will call the client to confirm his reservation before you book his appointment. Once the appointment has been confirmed, simply click on the BOOK button.
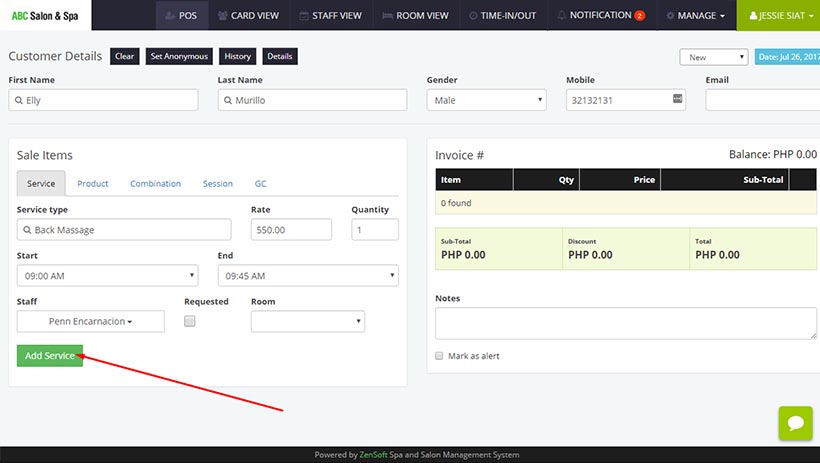
3.) The name of client, telephone, email, services booked, preferred staff (if any), and date/time of booking will automatically be placed in the POS module. You may change the service details or add more services/products as needed. Then, click on the ADD SERVICE button.
4.) Once you have made the booking go back to the ONLINE BOOKING details page and click the delete icon to remove it from the list![]()
5.) You are done!
You may want to create discounts or freebies to clients who will book online to attract more customers!